Krystal Kart
Engine: Unity (Mobile AR)
Role: Level Designer
Internship Project — Anlter Interactive
Overview
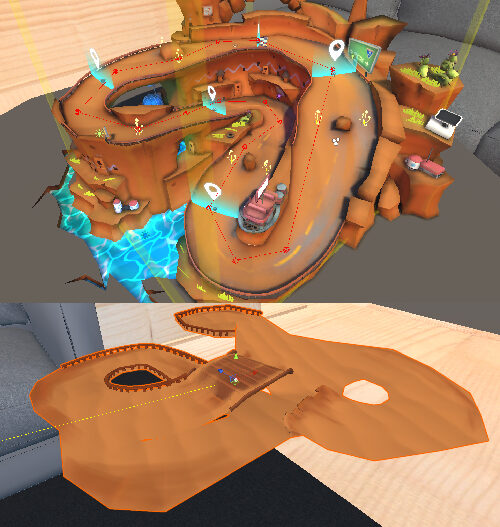
Krystal Kart is a mobile AR racing game where players race mini-karts across tabletop tracks. Designed with intuitive controls and clear visual feedback to be accessible for younger mobile users. As the level designer, I focused on creating balanced, readable tracks that worked intuitively in augmented reality while delivering skill-based challenge and replay ability.
Key Design Contributions
- Track Design Philosophy: Balanced technical turns with straightaways for pacing and flow; crafted layouts to support all skill levels from new players to experts.
- Visual Signposting & Readability: Designed props that naturally guide players (e.g. arrow-shaped landmarks), and ensured visual clarity across AR environments.
- Power-Up & Checkpoint Placement: Positioned power-ups and checkpoints to shape race dynamics, manage difficulty spikes, and reward mastery.
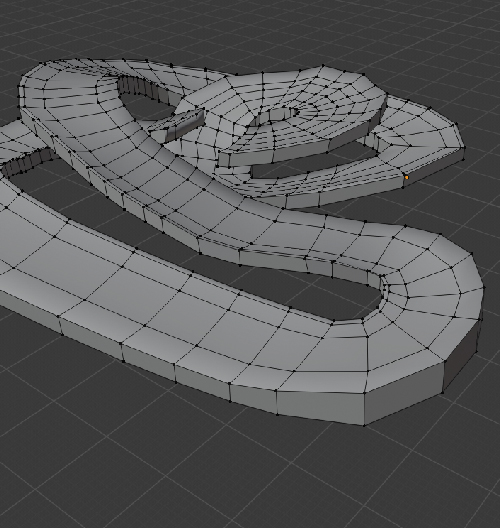
- Prototyping & Iteration: Sketched track concepts by hand, modeled them in Blender, then brought them into Unity for rapid playtesting and iteration.
- AR-Specific Constraints: Adapted layouts for real-world table surfaces; optimized mesh performance and collision handling for smooth mobile AR gameplay.
⚙️ Technical & Production Highlights
- Rapid Development: Delivered full track from concept to final gameplay handoff in under two weeks.
- Collaborative Pipeline: Coordinated closely with 3D artists to ensure clean transitions from prototype to final visuals.
- Player-Centric Testing: Ran playtests across player skill levels, using heatmaps and feedback to tune flow, frustration points, and replay value.
- Documentation: Authored a full Level Design Document, outlining process, iteration cycles, and handoff protocols to maintain quality across future tracks.
🛠️ Tools Used
Unity • Blender • AR Foundation • Custom Collider Setup • Playtest Iteration Loops
🌱 Reflection
This project strengthened my ability to design for physical space, iterate quickly, and think holistically about the player experience in unconventional formats like AR. Working in a fast-paced indie environment made me more autonomous, feedback-driven, and grounded in real-world production timelines.